Showing posts with label DIY. Show all posts

Saturday, March 25, 2017

Easy Step by Step Instructions for Creating Memorable and Pretty Walls with Our Daughters' (It's Fun Aswell)

Hi Everyone,


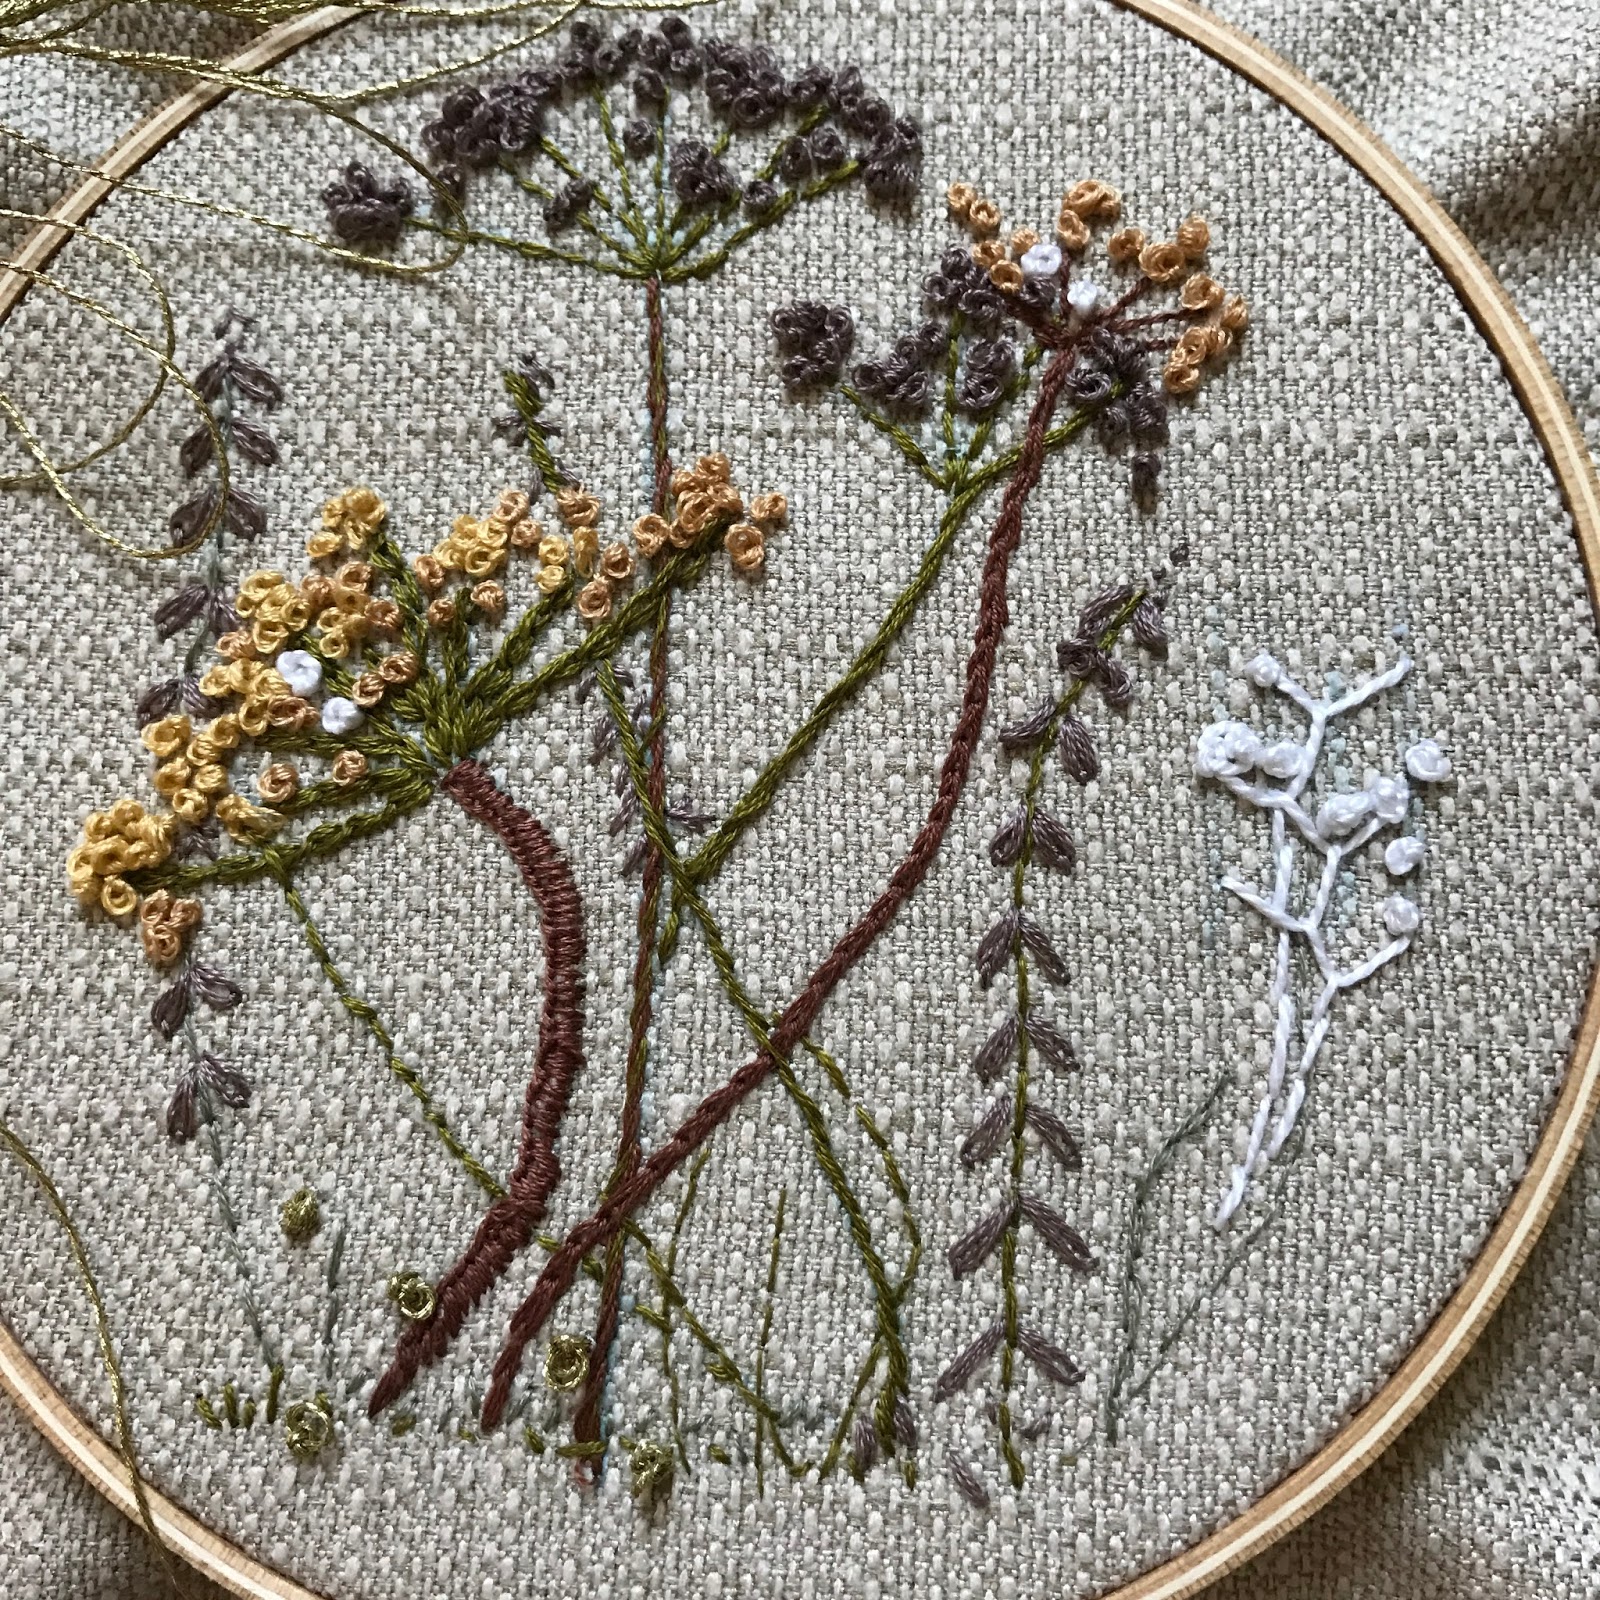
I have fond memories with my Mother creating fun projects and learning creative stitches and knitting projects.  It was a skill that I didn't much think about until I became a mother and now I am so thankful to pass on those wonderful memories to my girls'.  Admittedly, our time is limited together so it really is only for a few minutes each week that we can sit and enjoy each others company.  The beauty of these project however, is they are not time consuming or difficult and we can easily  pick up  where we left off.  My oldest (10 years almost 11 now:(0)  especially enjoys these times together, perhaps because of her age or maybe that she just enjoys it, either way I am happy to sit for a moment when she asks me to show a new stitch to her.  So I really encourage you and your daughters' to pick up this easy craft to decorate your own walls or perhaps gift these to your teachers, friends or relatives.  They will be thrilled with your creativity and thankful for your thoughfulness.  I just recently finished these two landscape, weed type patterns:)


Embriodery Hoop Art Supplies


1.)Embroidery Floss  2.)Embriodery Needles  3.) Embriodery Hoops  4.) Linen Fabric

Draw out the template.  I found a plethora of very sweet drawings online and used what I saw to create something similar to share with you all.  I wanted to create a "work of art" for my daughters' room so chose a sweet pattern that would fit her wall theme.  We chose about 4 different embriodery thread colors.  I would limit to about 4, since too many colors could make the end result messy and the shape not easily discernable.  Now that we have chosen the colors, we move onto the stitches.  


The Simple, Easy Stitches.  Below is a pictorial I pulled from Better Homes and Gardens that explains really well the basic stitches to make really any kind of sweeet pattern.  But a little more helpful instruction probably wouldn't hurt, so I will explain how we put together the rest of our little girl pattern.  I mostly used a very simple straight stitch, what we use to hem clothes for the outline(not pictured here),  but explained further down below.  

Below is pictured the basic straight stitch.  Its basically pushing the needle to the back of the fabric and coming out through the front. once at the end of the row going back to create a solid line of embriodery stitches.  I mixed up the colors here to create interest, alternating pink and red lines of stitches.  

Oops, I failed to mention that you obviouly need to knot the thread.  This is fine since we are creating a hoop, but if you are planning on making a pillow, it's best to not knot the thread since it creates bulk.


On the feet I chose a long stitch, stitched very close togther, like picture taken below.


Almost finished here.  Danielle  completed the balloons in a few minutes and then we used a push-pin to mount on her wall in her room.  She is hoping to fill her wall...maybe over the summer instead of endless hours wasted in-front of the TV:)


I've attached a few more images for you all to view and maybe get inspiration from... Enjoy making these, they really are so cute on the wall and it does bring great joy to the little ones to see their works of art displayed.

herdogblog.com


LiliPopo


This is a sweet pattern to follow and easy to copy.  

Embroidery.com

Toyspark.blogpsot.com


yodowandadawan.com


Andstitches.blogspot.com


emelineandannabelle.com

Visit


So now you all can see my latest obsession, embroidery hoops.  I'm looking forward to practicing so much more and creating memories with my girls'.  Thanks for reading today!

Hope you all are enjoying a relaxing and peaceful Sunday.

Warmly, 
Sarah  😊


Friday, May 31, 2013

Fun Fabric Ideas

Hi Everyone,


  I confess, I love all  objects for the home that are custom and beautifully handcrafted, but do not like the price tag that comes along with such finds.  So if at all possible I try to craft and put together on my own to give certain elements of my home a "custom" and unique look.  I was recently asked by HOMETALK to curate a list of fun fabric ideas that won't break the bank and give  elements of your home that one of a kind look.

 I recently purchased a consigned wing  chair and reupholstered in linen adding trim and nail head trim for a custom look.


I completed a girls bedroom and added a few DIY projects.  These cute lampshades are an adorable addition to Lauren's Bedroom and the fabric rosettes on the painted branches add a little whimsy and interest to the focal wall.


The Fabric Rosettes


The easiest way to add a custom look in any room in the house is throw pillows.  Here I sewed budget friendly pillows that are trendy and fun.
Trendy throw pillows for a couch or bed

Lastly, I redid a footstool, added a linen pillow with ballet slipper ties and rosettes for a cute addition to my daughter's bedroom.


 I hope you enjoyed this rundown of fun fabric ideas for the home. Please visit HOMETALK for much more fabulous fabric pictures and tutorials and huge thanks to HOMETALK for allowing me to curate this fun board.

Have a wonderful, fun weekend!!

XOXO,

SK

Linking up with http://www.flamingotoes.com, http://www.sugarbeecrafts.com/

Thursday, May 23, 2013

Making A Lampshade

Hi Everyone,

In my last post, I revealed my daughters Pretty in White Bedroom, pictured here and mentioned the lampshade.  So I thought I would share how I put this together.  Its a super easy, very budget friendly and unique.  So here goes.


Here is what you will need:
               Fabric.I used about 1/2yd
               Simple Pinch-Pleat tape
              Trim for the bottom hem
               Double-Folded Bias Tape for the top
               Stitch Witchery


I purchased the lampshade at Hobby Lobby.  It came with a paper template which I used to measure the fabric.   I did add about 6-8in in width since I gathered the fabric at the top.


Step 1:   Stitch the Pinch Pleat at the top

Step 2:   Iron on the Double Folded Bias Tape to the top to conceal the raw edges  Pull the tape to gather then sew the sides together.

Step3:    Use Stitch Witchery to attach the Trim to the raw edges on the bottom of the shade  and
                         Voila It's Done!


So Easy! and cute.  I think it is a fun addition to Lauren's Bedroom and really pops against the off-white walls.  So would love to know if you plan on doing this to one of your lampshades.  Please do tell! Also found this awesome website with all things lampshades.  Check it out here.

Have a great rest of the week and weekend.  We are wrapping up the school year here, so tons of school parties and fun activities for the little ones.

XOXO,

SK 
Linking up with http://www.jenniferrizzo.com,http://www.frommyfrontporchtoyours.com/,http://www.stonegableblog.com, http://www.lizmarieblog.com/ ,http://www.itsoverflowing.com/, http://too-much-time.com/,http://piecedpastimes.blogspot.com, http://www.flamingotoes.com, http://www.create-with-joy.com/, http://myuncommonsliceofsuburbia.com/, http://www.thriftydecorchick.blogspot.com/

Friday, May 10, 2013

Trendy Ikat/Chevron Pillows and other Sewing Projects

Hi Everyone,

 I hope you all had a great week, whether it be productive or relaxing. I was able to catch up on a few sewing projects over the weekend, including a sweet robe for my littlest one, finishing touches on a pillow order and ordering fabric for panels in our breakfast area. I can't wait to see the fabric and start on the project. I just love how panels soften a room and immediately give the room warmth and comfort. So today I will be sharing my completed pillows and sweet, bright pink robe.


Homemade pillows with ribbon
Homemade pillows with rosettes to match the shabby chic meets modern rustic bedroom


Pillows with ribbon


She loves her new robe!


The hood is lined in a coordinating fabric

Used double wide bias tape to hide all the raw edges in a light pink


Below are sweet and chic pillow I found via pinterest and blogland. Inspiration I think for future projects and also great sites for decor shopping.

Source
Source

Source


As always my sweet followers, Thank you for reading this blog. I hope you all have a fabulous weekend. 

XOXO 

SK

Linking up with www.lizmarieblog.com, http:/www.too-much-time.com, http://www.flamingotoes.com, http://suburbsmama.blogspot.com, http://www.niftythriftythings.com, http://www.create-with-joy.com,
http://www.myuncommonsliceofsuburbia.com/, http://thefirstyearblog.com, http://handmadecuddles.com
 

http://www.stonegableblog.com, http://diybydesign.blogspot.com/, http://www.jenniferrizzo.com,  http://www.frommyfrontporchtoyours.com

Wednesday, April 24, 2013

Fun Table Centerpiece for the Spring into Summer

Hello Everyone,

The grass in finally starting to wake up from a long rest and the buds on the trees are just peeking through their branches.  I think within the next week or two Spring will be here in all its glory.  So in anticipation for Summer/Spring  gatherings I experimented with some fun tablescapes.  I thought it would be fun to add fresh produce along with little handmade nests..plus I could easily cook these after a few days instead of throwing out.  I love the texture of the baskets alongside more formal silver and silver-plated bowls.  I thought the birdhouse would be a whimsical and cute accessory and reminds me of warm weather and new beginnings.

So here we have it.....


Here's another peek...


Today is a really pretty day after so much rain...we might spend most of the afternoon outdoors...Thank goodness.

Thanks so much for reading and enjoy the rest of your week.

I linked up with     http://madeinaday.com     http://www.jenniferrizzo.com   http://www.itsoverflowing.com


http://www.stonegableblog.com XOXO

SK

Tuesday, April 23, 2013

Crafting and Reusing an Old Tray

Hi Everyone,

 I have so many accessories I have collected over the years that are just a little dated and need a fresh look. One of these pieces I had was an old tray from World Market  a dark mahogany, high gloss finish, with plenty of scratches. I did, however like the simple shape and knew it could be put to good use in the home. So a here is quick look of the end product ....

I painted the tray with milk paint and distressed a little around the edges and lastly painted some scrolls for a little interest. I thought to add paper to the base, but  later changed my mind and glued fabric. On the fabric I stenciled a monogram and stitched around the edges...So there you have it... At the moment I am using it as wall art, however it is pretty versatile and I will probably use it to store all sorts of odds and ends, perhaps jewelry or use as a tray for a centerpiece....the possibilities are endless. So sorry for the bad pictures...We haven't seen the sun in so many days and the lighting is so sad, but wanted to show a little of what I have done this week. Hope you week is off to a great start! Spring is coming here and I cannot wait! Thanks also for all your lovely comments on my previous posts, I really love reading all of them.

 XOXO

 SK

Friday, April 12, 2013

Little Sister's Big Girl Bedroom Reveal

Hi everyone,

 I hope your week has been great! Once again I spent the week putting the finishing touches on Jordan's room. I can now say it is finally done.... thankfully.  This makeover was relatively budget friendly, exception being the purchase of the frame and mattress.
Jordan loves her new room, especially one of her favorite dresses, now to small for her, but is used as an accessory on the wall.  I toyed with the idea of framing it, but knew it would compete with the windows above.


I just finished completing these panels, with a blue/gray linen fabric purchased from Joanns' with a 40% off coupon.  The wing upholstered chair, my toughest DIY  to date,  is nestled in a corner, with a linen pillow I pulled together a few weeks ago.  The quilt, her grandmother sewed several years ago and I can't quite depart with.  The art work I completed a few days ago, too.


The dresser was previously in her other room, I just painted a mirror I had on hand and added a little fluff.


I purchased all the bedding at target in the shabby chic section.  I love the trendy fabric with the traditional shabby chic!


A view of the other side of the bed. 


A wooden artwork I stenciled with gray and yellow oil paint.  Her birth date is stenciled in the corner and difficult to read.   I couldn't find the right angle to photograph.


 The artwork I painted using left over paint and I used chalkboard paint underneath.  I know to some it may look undone, but I kind of like the less formal straight line look. 


So there it is...the finished bedroom.  Now to tackle the MESS behind that door!
 Thanks so much for viewing this blog.  Please let me know what you all think...I do love to read all your sweet comments.  

Enjoy your weekend!!

XOXO
SK

Linking up with 
  http://www.itsoverflowing.com  
http://www.lizmarieblog.com  http://what-about.co  http://www.jenniferrizzo.com   http://tatertotsandjello.com   http://www.cheeriosandlattes.com    http://www.niftythriftythings.com   http://suburbsmama.blogspot.com/    http://piecedpastimes.blogspot.com   http://www.flamingotoes.com  http://www.create-with-joy.com   http://dimplesandpigtales.blogspot.com   http://pjhdesignsoneofakind.blogspot.com/     http://www.savvysouthernstyle.net/


http://somedaycrafts.blogspot.com http://www.frommyfrontporchtoyours.com/ http://www.astrollthrulife.net http://www.stonegableblog.com http://what-about.co http://www.thegunnysack.com, http://www.thriftydecorchick.blogspot.com/