Wednesday, December 23, 2015

Polka Dots on the Walls

Hi Everyone,

Almost Christmas and we are in countdown mode in our home.  I have been in the kitchen a little,  preparing sweet treats as gifts, celebrating at a few holiday related activities, but other than that had a restful weekend.  We will be traveling this holiday weekend to South Carolina, visiting relatives and celebrating Christmas with them.  It will be a joyous time and wonderfully exciting for the girls.

Before we wrap up this year and begin a new, I wanted to share with you a polka dot wall "makeover"  This project required a little time to complete, but was an easy application.  After a little  research, I found  the best method to create a polka dot, or bubbles on the wall, so aptly named by my daughter.


Below are the supplies needed to create your polka dot wall.


1.  Stencil Paper, can be purchased at any craft store  2.  Exacto Knife, also at your local craft store 3.  Compass or a bowl of varying sizes to trace around


After tracing your circular shapes on the stencil paper cut your shapes with the exacto knife.  On my stencil paper I traced 4  differing circular shapes.  I picked 2 different paint, light blue and light green, per kiddo request.

Using painters tape I taped the stencil paper on the wall and chose the the color for each circle. Make sure that is consistent to avoid mixing paints. As an aside, the stencil paper should be laid out for a few days to straighten out, maybe weigh down the edges.  This step will make your application of polka dots that much easier.

To create a little asymmetry I changed the direction of the stencil paper and layered circles on top of each other.  Make sure your paint is dry before taping the stencil paper over previously painted circles.

To paint the circles, I applied a small amount of paint on my brush, too much paint on the brush, and the excess will seep underneath the shape.  I brushed from the outside of the circle toward the middle, as shown below.


See Easy Peasy!  A fun and easy way to create a little whimsy in your kiddos rooms, playrooms ect.


Merry Christmas, Happy Holidays Everyone! I hope it is a blessed time for you.

If you wish to follow my posts on social media...Here is a link for Pinterest and Facebook.
Thank you!

Sarah

Linking up with www.savvysouthernstyle.net

Thursday, December 10, 2015

Simple changes in a girls bedroom

Hi Everyone,

I hope everyone is enjoying the holiday season so far.  I love all the christmas lights in and around the stores, the christmas music and spirit.  The long christmas shopping lists not so much, however, I am almost done, so thankfully I can now enjoy the season without the panic of "too much to do and not enough time."


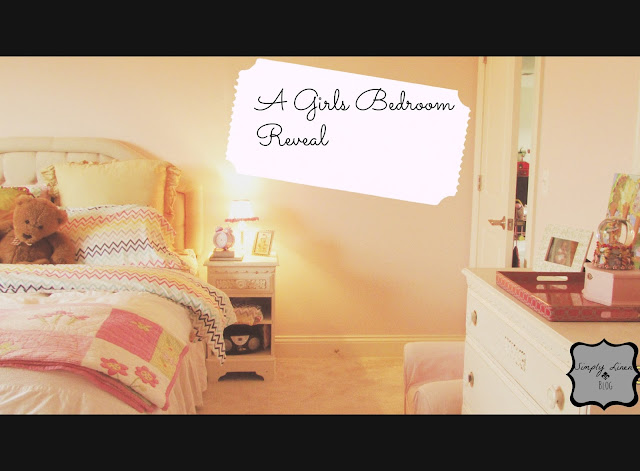
Today, I am going to share one of my daughter's bedroom.  My goal from the onset was to keep most of what she currently owned, from big furniture pieces to all her knick knacks she so lovingly holds onto. My budget was $100.00.  I painted the walls a very soft pink, so that her bright bedding and assessories would take the center stage. The paint color is so pretty, I especially love the room in the evening with the soft lighting, it glows so beautifully.

After painting, Danielle and I picked out this fun trendy chevron sheet set from Target.  She is in love and would very much like to continue the chevron theme on the walls and more in accessories.  We haven't started that project, yet, maybe in the future after her two other sisters get to choose a pretty wall color.


 We also picked out a tufted headboard from Overstock.com.  They have such a wonderful variety, very well priced and easy to install.  On the opposite side of the bed, we put together a desk area.  The desk was mine in college and just repainted a bright teal color.  She stores her books and other odds ends in all the compartments. The desk at moment is great for clutter control.  Its is amazing how quickly the little things crowd a room:)  Our latest is Shopkins and Littlest Pet Shop.


The dresser was a hand me down as well.   It was painted and repurposed several years ago.  It funtions well, although it probably is need of a fresh coat of paint soon.  I love the use of trays, this one below was a steal from Hobby Lobby.  Danielle also proudly displays her artwork in her room.  At the moment she just has a few projects, which she rotates every so often.  I love the personality in this room.  It is so Danielle!


Thanks for stopping by today!  Please visit again soon and follow me on Facebook or Pinterest, I would be so thankful.  Enjoy the rest of your week.

Sarah