Saturday, February 8, 2014

Pretty Pillowcase Tutorial

Hi Everyone,

I finished up this week by completing  my linen pillowcase tutorial to share with you all.  Certainly an easy project, but definitely does require accurate cutting measurements.  So make sure to double check measurements before cutting and press, steam regularly thought out your project. I think these pillows look adorable in my daughter's room and add that special touch to complete the whimsical, soft feel of the room.


Here are the supplies needed for this project. Make sure to wash in warm water and tumble dry followed by a good press and steam.  Cut the frayed edges and lay out  about 2 yds of fabric for 2 standard pillowcases with envelope enclosure.


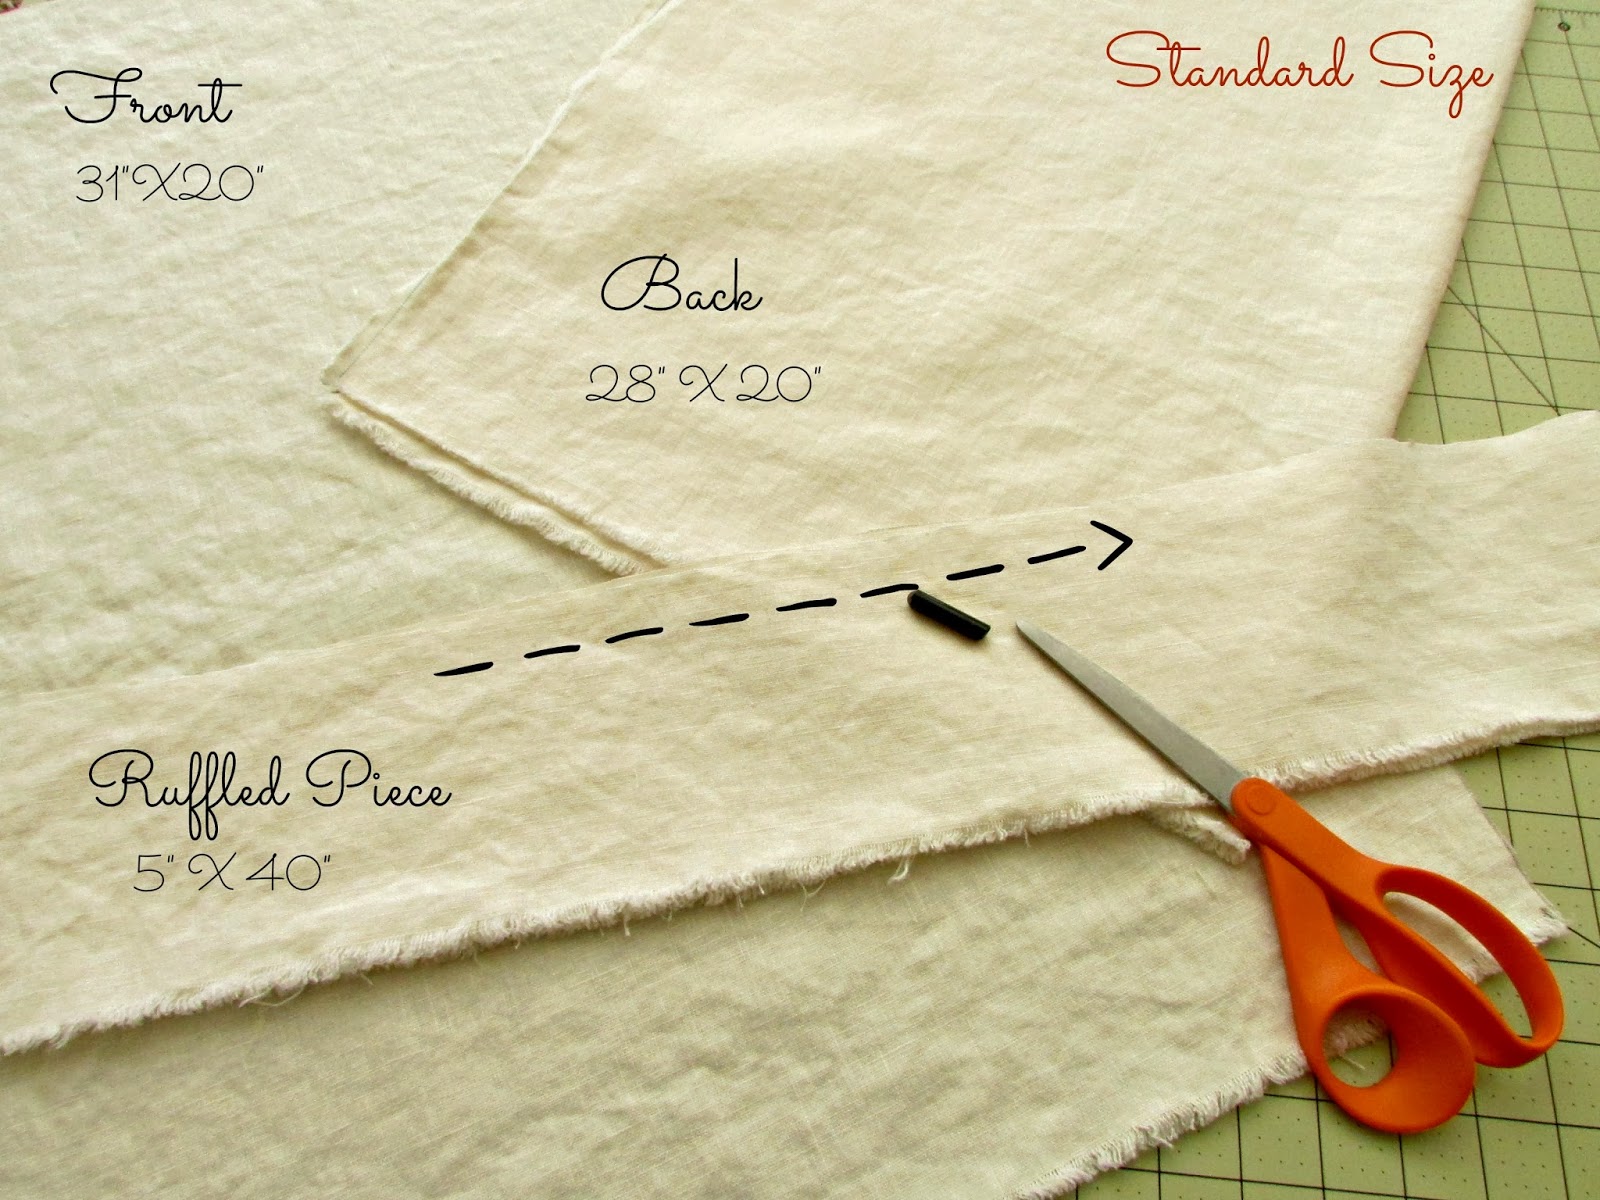
Pictured below is the measurements for each piece.  Remember to include the enclosure piece {not pictured} 6"X 20"


My first step was to ruffle each side of the length.  Pictured is my ruffler foot, but simple gathering by pulling the thread works wonderfully as well. { See this link for a great tutorial}


Now attach your ruffled piece to the front, right-side together.  You might need to adjust the gathers to fit the 20" width.

Pin the top piece for the enclosure {6"X 20"} right side together, as in this picture then press.  Make sure to double hem this piece before attaching to the front.


At this point pin the lace to the seams.  Make sure to pin adequately so there is no movement.  Now
I used lace to conceal the edges, but really the sky is the limit.  Use a coordinating piping, tape or just leave as is...


Sew the lace to the linen fabric.  I sewed the lace trim on both sides with a zigzag, with pink thread on top and the cream on the bottom for a professional touch.


Now pin the front to the back, pressing the enclosure piece first{ right sides together}.  Trim all the  fabric around the edges, zig zag or serge the edges and you are done! Easy Peasy, Really!


Have fun creating these pillows and please let me know if you have any questions.

Til Next time:)
XOXO,
SK


Linking up with~  http://too-much-time.com/ Savvy Southern Style

Monday, February 3, 2014

Romantic Linens for the Bedroom

Hi Everyone,


Recently I purchased from Pottery Barn Pure Linen pillowcases for our guest bedroom.  They are a beautiful soft gray color and  equally beautiful to the touch.  I don't mind that they crease easily, I think it just adds to that romantic, charming sense that a French shabby chic bedroom swathed in softness lends to a room.   My new purchase inspired me to create a few linens of my own that are not only made from 100% washable linen, velvet and lace but are crafted with a few sewing techniques I use regularly.  There is plenty of fabulous inspiration online as well which is pictured below.  Oh my goodness, isn't this bed absolutely dreamy? It is layered in soft velvets, linens and cottons, impeccably crafted as well and the color is gorgeous.


 So taking inspiration from this high-end retailer I created my own linens with some pretty details.  Below is a few of my sewing crafts this past week.
The Euro sham pictured below is made of a creamy linen with brown velvet trim.  It was a little rough to the touch initially, but after several washes the linen is so much softer.  The pillowcase was an after thought, since I had extra fabric leftover from my daughter's panels.  I ruched the sides and added lace to edge. It lends a nice touch to Jordan's room and looks interesting paired with her trendy bolster. {tutorial}


The gray cotton pillowcase turned out nicely so I used off-white linen in my next pillowcase with hot pink lace trim {pictured above}  I will be sharing the tutorial next time, but wanted to give you all a sneak peek.


Sewing pillowcases and euroshams is such an easy project for novice sewers and can be rewarding since we can add all those special touches to make a room unique and interesting all on a tight budget.

Thanks for reading along today! Enjoy the rest of your week!

XOXO,
SK